 Ferndale
 Why Birch Bay Punishes Ordinary Siding
Birch Bay sits right on the water, and that changes what siding has to survive compared to a home a few miles inland in Ferndale or Bellingham. Salt-laden air moves off the bay and settles on exterior walls day after day, year after year. Add Whatcom County's long wet season — driving rain that comes in sideways off the water, not just straight down — and you have a combination that finds every weakness in a siding system faster than almost anywhere else in the county.
Then there's moss. Birch Bay's shaded lots, tree cover, and near-constant moisture from fall through spring give moss and algae months to establish themselves on anything that holds dampness against the wall. Siding that can't shed water quickly, or that traps moisture behind it, becomes a growth surface instead of a weather barrier.
None of this is exotic — it's just what coastal Whatcom County does to a house. But it means siding installed here has a smaller margin for error than siding installed in a drier, more sheltered part of the state.
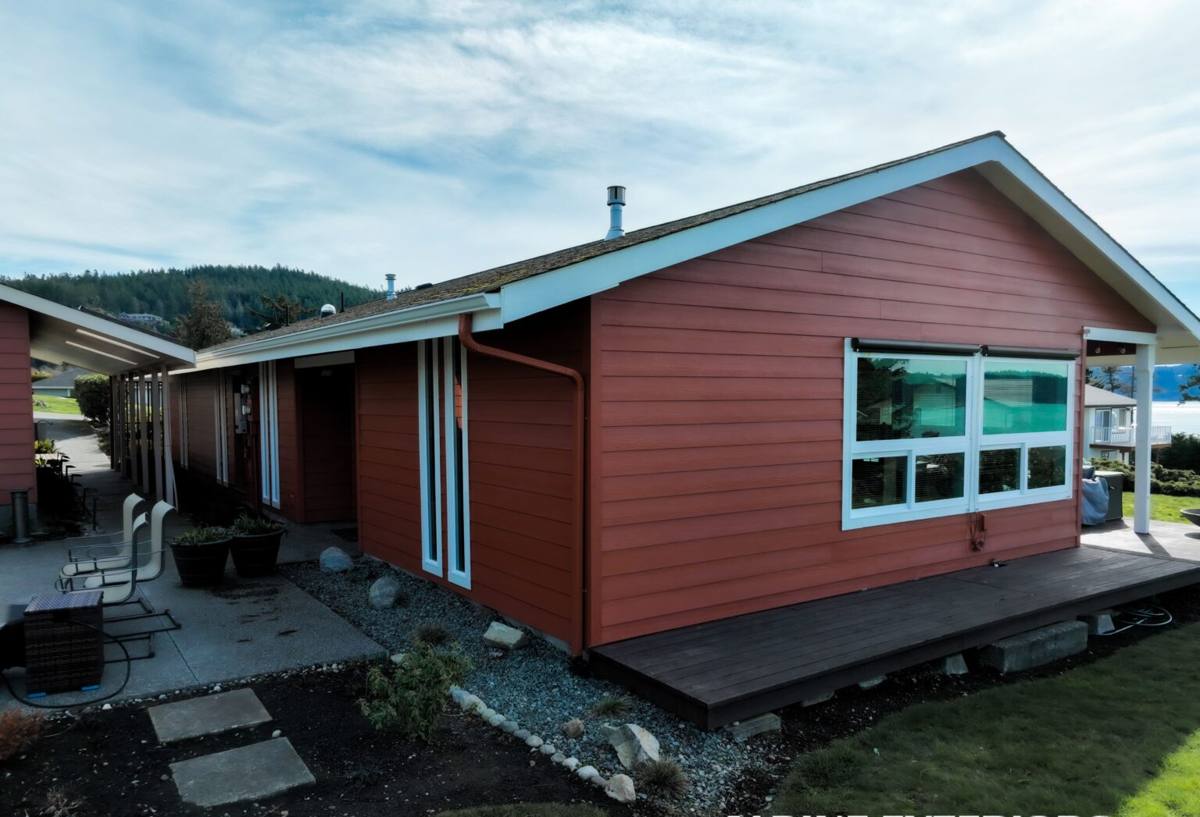
What Birch Bay Homes Actually Need From Their Siding
Three things matter more here than in most other places we work:
- Moisture rejection, not just moisture tolerance. The siding material itself has to resist water absorption, and the assembly behind it has to manage the water that does get past the surface.
- Dimensional stability in salt air and swinging humidity. Materials that expand, contract, or warp with moisture cycles open gaps at seams and fasteners — exactly where salt spray and wind-driven rain get in.
- A surface moss and algae don't love. No siding is immune to organic growth in this climate, but some surfaces hold onto spores and moisture far more readily than others.
When we walk a Birch Bay property, we're evaluating exposure to the water — how direct the salt air and prevailing rain are — before we ever talk about color or trim style. A home on a bluff facing the bay needs more attention to flashing and drainage than one set back and buffered by trees.
Why We Install Only James Hardie Fiber Cement
We stopped installing vinyl, LP SmartSide, primed spruce, cedar, and other fiber cement brands on Birch Bay homes for the same reason: in this specific climate, the trade-offs of those materials show up faster and cost homeowners more over time.
Vinyl expands and contracts significantly with temperature swings, and in salt air it can chalk and fade faster than in a drier inland climate. Wood siding — cedar or primed spruce — needs a maintenance schedule most homeowners can't realistically keep up with once moss and moisture get a foothold; repainting and resealing on a coastal exposure is a different job than the same task fifty miles inland. Engineered wood products like LP SmartSide are treated to resist moisture, but they're still wood-based, and a compromised seal at a cut edge or fastener point in a wet, salty environment is a bigger risk than it is in a drier region.
James Hardie fiber cement is non-combustible, doesn't expand and contract the way wood or vinyl does, and holds its factory-applied ColorPlus finish without the repainting cycle wood siding demands. It's not immune to moss — nothing mounted on an exterior wall in Birch Bay is — but it doesn't feed organic growth the way wood substrates can, and it doesn't degrade structurally from the moisture that inevitably reaches it. That's why it's the only siding we put on homes here.
Choosing the Right Hardie Product Line for a Bay-Facing Home
James Hardie makes climate-engineered product lines, and the right one depends on how exposed the home is:
| Product Line | Best Suited For | Why It Matters in Birch Bay |
|---|---|---|
| HZ5 | Homes with moderate exposure, set back from direct bay wind and spray | Engineered for wet, humid climates with freeze-thaw cycles — the Pacific Northwest baseline |
| HZ10 | Homes with direct, unbuffered exposure to bay wind, salt spray, and driving rain | Formulated for the harshest moisture and wind-driven rain conditions Hardie rates for |
| ColorPlus Finish (either line) | Any Birch Bay home where repainting is something you'd rather not manage | Factory-baked finish resists fading and chipping better than field-applied paint, especially with salt exposure |
We make this call based on a site walk, not a guess — a home tucked behind trees a quarter mile from the water doesn't need the same spec as one with an unobstructed view of the bay.
What a Correct Installation Actually Involves
The siding material is only part of the equation. Most siding failures we get called out to inspect — in Birch Bay and elsewhere — trace back to installation shortcuts, not the product itself. In a high-moisture, salt-air environment, those shortcuts fail faster.
Weather-Resistive Barrier and Drainage Plane
Every wall gets a properly lapped weather-resistive barrier before siding goes up, with a drainage plane behind the siding so any water that gets past the surface has somewhere to go besides the sheathing. On bay-exposed walls, this detail is not optional — it's the difference between siding that sheds an occasional wind-driven rain event and a wall assembly that stays wet.
Flashing at Every Penetration
Windows, doors, hose bibs, vents, and any other wall penetration get flashed correctly, with proper overlap so water is directed out and down, never behind the barrier. This is the single most common point of failure we find on older installations near the water.
Fastening to Hardie's Specification
Fastener spacing, type, and placement follow James Hardie's published installation guidelines exactly — not a generalized siding approach. Correct fastening keeps panels tight and joints sealed, which matters more here because a loose joint is a direct path for salt spray and rain to reach the wall behind it.
Proper Clearances
Siding is installed with the manufacturer-specified clearance from grade, roofing, decks, and other surfaces. Skipping this clearance is one of the most common reasons we see moss and rot develop at the bottom courses of siding on Birch Bay homes — the material stays damp far longer than it should.
Our Process for a Birch Bay Siding Installation
- Site walk and exposure assessment — we evaluate wind direction, sun exposure, tree cover, and proximity to the water to determine the right Hardie product line and detailing.
- Existing siding removal and sheathing inspection — we check for hidden moisture damage before covering anything back up, since problems found now are far cheaper to fix than problems found in five years.
- Weather barrier and flashing installation — the part of the job that determines whether the siding performs for decades or fails in one wet winter.
- Hardie panel or lap siding installation — installed to manufacturer spec, with attention to fastening and joint treatment appropriate for coastal exposure.
- Trim, caulking, and finish detail — the details that keep water out at corners, edges, and transitions.
- Final walkthrough — we review the completed work with the homeowner before calling the job done.
Signs Your Current Siding Isn't Keeping Up
If you're not sure whether your Birch Bay home's siding needs attention now or can wait, look for:
- Moss or green growth that returns within weeks of cleaning it off
- Soft spots, especially near the bottom courses or below windows
- Visible gaps or separation at seams and corners
- Paint that's peeling or bubbling rather than just fading
- Musty smell or visible staining on interior walls that back up to exterior siding
- Warping or bowing panels, particularly on the side of the house that faces the water
Any one of these can point to moisture getting behind the siding rather than shedding off it — worth having looked at before it becomes a sheathing or framing problem.
Cost Factors for Birch Bay Siding Installation
Every home is different, but the factors that move the price on a Birch Bay project are fairly consistent:
| Factor | Why It Affects Cost |
|---|---|
| Product line (HZ5 vs. HZ10) | HZ10's added moisture and impact engineering costs more than standard HZ5 |
| Existing siding removal and disposal | Tear-off adds labor and disposal cost versus new construction |
| Sheathing or framing repair | Water damage found during removal has to be addressed before new siding goes on |
| Home size and wall complexity | Dormers, multiple stories, and cut-up wall lines add labor time |
| Trim and finish detail level | More corner boards, window trim, and accent detailing increase material and labor |
| Exposure level to the bay | Bay-facing walls often warrant more flashing and drainage detail, adding labor |
We give homeowners a real number after a site visit, not a phone estimate — exposure and existing wall condition vary too much house to house to guess accurately.
Why a Crew That Already Works Birch Bay Matters
Siding installation in Birch Bay isn't the same job as siding installation in a dry inland town, even within the same county. A crew that regularly works this stretch of coastline already knows which walls need extra flashing attention, how much clearance to build in given the moss season, and which Hardie product line makes sense for a given level of bay exposure — before they even start the site walk. That experience shows up in fewer surprises during the job and in siding that's still performing correctly a decade or two later, not just on installation day.
If you're planning a siding project in Birch Bay, we'd like to take a look at your home and give you a straightforward, no-pressure estimate — what your walls need, which Hardie product line fits your exposure, and what the job will actually cost. Reach out using the form below to get started.